I have been posting about the Superhero party we had for Kares. Here is the first post. Here is the link to the decorations (under $12 for it all). Here is the link to the superhero themed food we served. Here are the superhero party favors.
This post is about how we entertained over 20 children under the age of 6!
The biggest help was a BOUNCE HOUSE! We got a great deal on ours, but I know this can be a big expense. They didn’t have any superhero themed ones so naturally when you ask a 5 year old girl what she wants…Disney Princesses! It kept the little superheroes out of the house and entertained for hours!
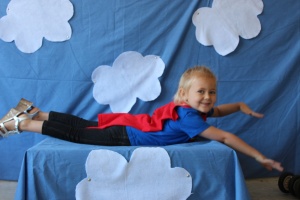
My favorite part was the photo booth we had for the kids. I wanted to do something that would be a little different and memorable. So I set up a place for them to fly!
This was pretty easy. I bought 4 yards of blue fabric on sale for $1 a yard. Then bought 2 yards of white felt (hindsight I didn’t need that much) to make the clouds. I made a small area for the kids to lay on (I used a part of my couch chaise lounge, but a box or cushion would work too). Then I used thumbtacks to hang the fabric on the wall in our garage. I was sure to cover the part where they lay as well. Then the kids took turns pretending to fly through the clouds with the capes. I used my new camera to take great photos of them. I am including a picture of each child in the thank you notes. When you crop and frame it just right the pics look great!
The kids and adults had a great time at the party. I can’t wait to plan the next get together!
I have been posting a lot about the Superhero party. Here is the link for the Decorations. Here is the link for the food. This post is about the party favors each of the kids got go home with.
One of the best parts of the party was watching these kids turn into superheroes! I made a cape for each child to wear and take home. These were adorable decorations and then provided a lot of fun. Plus what kid doesn’t like to go home with a superhero cape?
I made these capes from t-shirts. Keeping my budget in mind, I wanted to find these shirts for cheap! THere were a few options. I searched the internet to try and buy them wholesale. Without having to buy 100 shirts, they were just as expensive online as they were in stores. Then I thought about going to thrift stores. I never actually made it to thrift stores because I found shirts at the Dollar Tree! I was so excited. They were in all different colors and sizes. Most of the shirts were irregulars, but that is okay, I was going to cut them up anyway!
Here is how I made superhero capes for $1
I took a t-shirt and cut it up the sides, then cut the sleeves off, then cut carefully around the front of the collar. THis way all that was left was the collar and the back attached. I wrote “Super” and the Kids names on them. (This made sure no one was fighting over a color at the party. Plus I had different size shirts, so the little ones could get a little cape and big ones a big cape) It was SO easy to do and looked so great. I hung the masks and the cape on a hanger.
Then I used the sleeves to make a mask for each of the kids. I just cut eye holes in them and they were able to put them on their heads. Finally I cut scraps to make wrist bands, head bands, or anything else. I put these in a bucket labeled “Extra Disguises” so they could just grab.
Kares wanted to do a craft project at her party too. I wanted something easy that the kids could do themselves. I found these little people cut outs and then made different colored capes. I provided markers, crayons, glue, and eyes for them to use. I set all of it up at a little table in the corner and directed a few kids at a time to go create their own superhero! We hung all of the heroes up on the window to dry and provide a little more decoration.
I was able to find Super Hero markers and crayons for $1 each. They were perfect for the party. (Also great when the markers didn’t get the tops put on…we threw them out without a worry) I put them in the bins I bought at the Dollar Tree.
I think the kids had a blast, and were able to take home a personalized favor. I thought it was better than a bag full of dollar store toys they will use for an hour! They now have their very own superhero cape and little craft to go with it.
I posted before (click HERE) about the Superhero birthday party we threw for our daughter’s 5th birthday. This post is all about the decorations! We (my girls and I) made most of the decorations ourselves, and I really kept it on a budget!
We put streamers hanging from the lights and fan that went in all directions. These provided a lot of color and were SO cheap. I got a pack of 2 at the Dollar Tree. I bought red, blue, and yellow.
I tried to use things that she already had to decorate with. This makes things even cheaper! One of my favorite decorations was when we made Superman fly above the kids heads. We hung up one of her stuffed superman dolls from the fan. It was awesome!
She got a big Superman blanket for her birthday. So we hung it up on the wall behind the table. This was a great backdrop for the cake cutting!
I also hung up a superhero beach towel on the wall in our garage. We opened up the garage and had it as a safe area for the kids to play and adults to gather. But it needed a little something. So we, again used what we had, and created a little more superhero decor!
Superhero capes are a must for any superhero party! I made these as favors for the kids to take home, but they also provided great decorations. I will make another post with a do it yourself tutorial. So be sure to check back or click on the link to be emailed each time I update the blog! I bought shimmery blue material to hang the capes from. I also used it to hang up the craft and for the bow on the door. This was $9.99 at Hobby Lobby but I used a 40% off coupon and got it for $6.00. I have so much left over that it will make great July 4th decorations! (Here is where I got the superhero cape idea)
I try to think about all of the little details when planning a party. I wrote on the bathroom mirror with a dry erase marker. I wrote, “Looking Good Superhero!” then put “POW, BAM, WHACK” around it. This was a cheap and easy way to add a little something extra!
The front and back door also had to fit in with our theme. I found a superhero dry erase board in the dollar section at Michaels. This was perfect! I hung it on our wreath hanger on the back door. On the front door I put a yellow and blue bow. I got the yellow bow at Dollar Tree and used leftover blue fabric to make the blue part. I was going to make a superman symbol to add to it, but time just got away from me and forgot to do it!

The front door had a yellow and blue bow. I ran out of time, but wanted to add a superman symbol to the middle!
Budget Breakdown: TOTAL DECORATIONS $11.00
Red, blue, yellow streamers- $3
Blue shimmer fabric- $6
Superhero Sign- $1
Yellow bow- $1
Blanket- FREE
Superman-FREE
Beachtowel-FREE
As you can see I kept the decorations very inexpensive. I used what we already had and was able to decorate my entire house. Keep checking back, I will post about how to make the capes, how to keep the food with the superhero theme, and how we were able to entertain over 20 kids at the party. You can sign up for emails so you never miss an update. Just click on the link to the right.
My 5 year old wanted a SUPERHERO birthday party this year. We had so much fun putting everything together. I wanted to share some of the best parts of the party with you! I will then make other posts with step by step instructions so you can easily make your own party!
I did a lot of research on how to create a great party for her. I found that some of the best pictures I saw there were some VERY expensive decorations, cake, favors and whatnot. I used ideas and a budget…This party was not super expensive, wasn’t too hard, and was SO MUCH FUN!
I plan on posting more pictures and tutorials on how to make this stuff yourself soon! Plus how I did it on a budget.
Click on the link to the side to receive an email each time I post a new blog so you won’t miss out on anything.
I found a great homeschool science lesson the other day. It was learning, but so much fun at the same time! I had to share with you. I was teaching Kares about matter. I was explaining the difference between liquids, solids, and gases. My experiment didn’t exactly look like the one I copied, but it worked well enough.
Materials Needed:
baking soda
vinegar
glitter
dish soap
glass jar
food coloring
Steps:
1. Fill the mason jar half way with vinegar.
2. Add glitter.
3. Add food coloring.
4. Put in a few spoonfuls of dish soap.
5. Mix together, trying not to create too many bubbles.
(Now the fun part begins!)
6. Add in a couple tablespoons of baking soda.
7. Watch the magic happen!
My girls learned that the vinegar was a liquid, the baking soda more of a solid, and it created a gas through a chemical reaction.
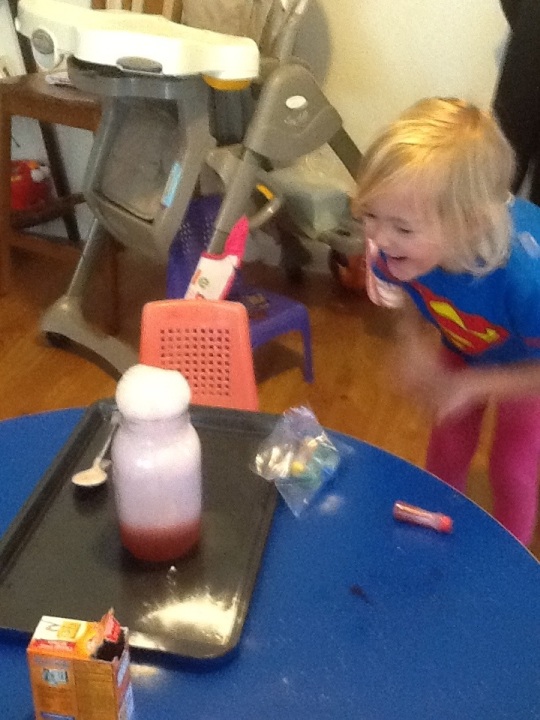
The dishsoap makes this different from the typical baking soda vinegar experiments. It creates a LOT of bubbles. Ours would have been better if I used a smaller jar, more dishsoap, and if tiny little hands would just watch. They were so excited about the bubbles they couldn’t help but touch it!
Here is the link that I used to get my experiment.
A little tip: I put the jar on a cookie sheet so that it didn’t overflow and make a big mess on the table.
Have fun learning!


